

1 Introduction
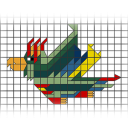
When building ground polygons for FlightSimulator 98, it was still sufficient to simply select a texture to be used. But the simple times are over... ![]() But it looks a little nicer now...
But it looks a little nicer now... ![]()
The price is that we no longer simply select a texture, but assign a complete set of material properties to each polygon. But since in general many polygons should have exactly the same material properties, we will create materials "map-wide" to simplify things. This is not only much more convenient, but also has the pleasant side effect that LOTUS can internally combine all polygons that look the same, thus optimizing performance significantly.
But how does this work with polygon materials?
2 First step: Import textures
Since textures are a separate content (again, for the purpose of optimization through possible use of one texture on many maps), they must be imported separately. This is done in the ContentTool.
Ideally you should create a separate working directory for the terrain/polygon materials. Since the folder name is also the later container name, you should not be tempted to call the folder "TerrainTextures" - if everyone does this, it will quickly become confusing! ![]() So you may call it "Grundorf_TerrainTextures" for example.
So you may call it "Grundorf_TerrainTextures" for example.
In this folder you put all textures you want to use later. Of course, these may have an alpha channel; for transparencies you will only use it for road markings, but usually especially for the intensity of the gloss. As with objects, *.dds and *.bmp files may also be used.
After starting the ContentTool, select "Independent Textures" and then choose the texture.
If it is a *.bmp file, a preview of the texture will appear (unfortunately this function is not possible with *.dds files). Furthermore, several options are already visible and preselected.
The options are usually already set as recommended for terrain materials. But here again in short form:
- "Repetition" (or "Repetition mirrored", "Clamped" or "One time"): How does the texture behave if you want to use it beyond its border - usually it should then simply "start again" - i.e. "repeat" itself.
- Filename: This is not the filename of the imported *.bmp or *.dds file, but that of the future LOTUS internal texture. It is simply the complete name of the original file plus ".ltx".
- Content-ID: As with other precontainers, the ID itself can be set here and the assignment of rights and visibility can be controlled. It is especially important that "Visible in map editor" is set here.
Now simply click on "Save & Pack", then the container will be packed, put into the LOTUS-MyContent directory and is available immediately. If several textures of this folder are to be imported, it is sufficient to first click on "Save", then select the next texture via "Import" and click on "Save & Pack" after the last import.
3 Creating and editing the material in the map editor
In the map editor, the corresponding control elements are located on the left in the "Polygons" section. On the one hand, the material can be selected for the currently selected polygon, but it is also possible to pre-select a material for the following polygons (if no polygon is currently selected). The material properties can also be set here with "Edit".
The "New" button can now be used to create a new material. A warning will appear that the material can no longer be deleted - the background is that generally only a small section of the map is loaded and therefore it would never be possible to check if the material is still in use when deleting.
The new material is created immediately and can be selected and set with "Edit".
The material properties contain the same options as in the Object & Vehicle tool. They are explained in detail in the article Material Properties. However, there are some polygon-specific settings (see below, are marked bold there).
The typical default settings for a terrain material are shown here:
This is where the previously imported textures are now selected: The texture is now searched for in order to select it. As additional information, the name of the container/working directory is displayed after the respective texture name.
When using already existing textures, it is very useful to first orientate yourself on the recommended material properties: Terrain material recommendations
In detail (whereby the general properties explained elsewhere are only briefly outlined here):
- Material type: General characteristics of the material. Standard is "Terrain", but other materials can also be used. After selecting Properties confirm once with "OK" and open again.
- Blend mode: Whether the polygon is displayed normally, transparent, etc. Except for road markings etc. always "Normal".
- Gloss factor and brightness of the gloss point: Setting whether the material is glossy or matt. If an alpha channel is used for gloss control, the first value corresponds to the highest gloss (e.g. 1)
- Scaling of the detail texture: The superimposed detail texture should - as the name says - add fine details to the "coarser" source texture and therefore needs to be repeated much more often. This factor sets how often the detail texture should be repeated within a repetition of the normal texture. If no detail texture is provided, set the value to 0.
- Use alpha value for gloss: Self-explanatory. Make sure that "Gloss Factor" is greater than 0.
- Silky Matt Characteristic: Changes the way the numerical values and the alpha value control the gloss
- Normal texture: As usual

- Detail texture: Here you can select a detail texture. How to blend the normal and detail texture is explained here: Detail textures
- Postpone. Ri. observer: Complicated to explain - please see material properties. Except for markings always 0.
- Grid: Interesting in the rarest cases...
- "Never"/"Only near"/"Everywhere" is uninteresting for ground polygons.
- Texture size (m): The resolution of the texture: How many meters is the texture "big" in the polygon?
- Road marking layer: Is this a material that is usually used in the road marking layer? If this option is activated and the material is selected for a polygon, it will be automatically assigned to the road marking layer - otherwise not.
- Plan type: This option controls how the polygon is drawn on the 2D map: Does it belong to the sidewalk, the road surface, is it e.g. a gravel surface of the railway, should it appear like a building floor plan or is it simply invisible in the map?
4 Creating the polygons
Attention: The last three material options are prefixes! Each polygon contains the same options! As a result, individual polygons can differ in these properties - an asphalt surface, for example, can also be assigned to the sidewalk in individual cases. However, the resolution or the assignment to the marking level can also be changed in individual cases.
Conversely, however, this means that changing the material properties in these three options does not initially affect the existing options! However, as soon as the same or a different material is reassigned, these properties will be adjusted to the material again.
Finally, it should be mentioned that the alignment and position of the texture within the polygon can be influenced: Besides the manual setting in the polygon options, the appropriate editing mode can be selected by right-clicking on the polygon, adjusting the parameter with the mouse movement and confirming with a left-click.